| Threat
Assessment: (Elite)
Estimated Number of Hostiles: 44
Disclaimer:
The great thing about these games are there are
an infinite amount of possibilities to accomplishing
the tasks. Of course some methods are better than
others and the following walk-through presents
one solution that I used that worked quite well.
HQ informs you during the mission
briefing to expect an entrenched enemy and snipers,
so be sure to include at least a sniper, but more
likely the best plan would be to bring two. Also
since one of the objectives is to neutralize the
roadblock and enemy vehicles, I chose a team of
OICW equipped rifleman because of their diversity
and a team equipped with some heavier weapons
as detailed above.
Introduction:
The key to this map, as well as most other maps,
is patience and stealth. I found this map to be
quite entertaining but not impossibly challenging.
Its imperative to "work smarter, not harder"
while progressing through the area. Initially,
I also didn't really focus on completing the objectives
as much as I did eliminating the enemy forces.
If you concentrate on eliminating the enemy, the
objectives will automatically be accomplished.
If you worry too much about the objectives, the
potential exists to lose sight of the threat and
that's when accidents happen.
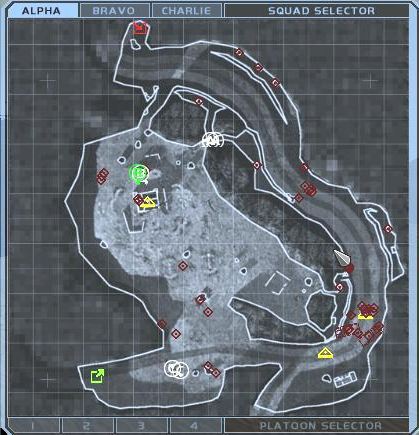
Objectives One and Three:
1. Neutralize Roadblock and Snipers.
3. Neutralize All Enemy Vehicles.
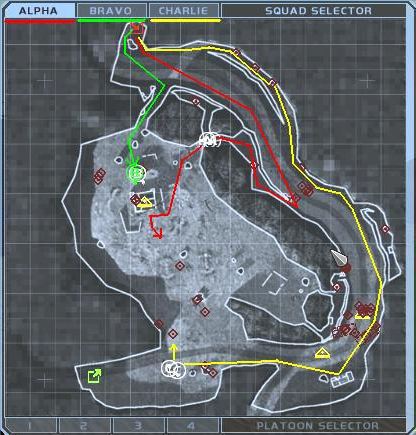
Due to the close proximity and
the nature of these objectives, Charlie Team elected
to be the tip of the spear and moved out to get
to work and almost immediately spotted three snipers
(each occupying a bunker) along the northeastern
ridge. These enemy soldiers were easily eliminated
without any confrontation. The sniper team also
dispatched a lone soldier along the southern ridge.
After they were eliminated, Bravo Team moved to
the mountain passage, to the south of the starting
location and held their position, being careful
not to proceed too far up the ridge. Alpha Team
held their position and covered the area to the
southeast.
Charlie Team proceeded to the
northeast where the enemy sniper bunkers were
located, continuing to monitor the area to the
southeast. A fair amount of enemy soldiers could
be seen. Charlie Team positioned themselves in
an optimal area and began exterminating the troops.
A lone soldier escaped to the edge of the northern
ridge and managed to get a shot off, injuring
a member of Charlie Team. A minor shot to the
chest. Charlie Team immediately returned fire
and dispatched the enemy soldier.
Charlie Team continued following
the ridge as it proceeded to the southeast. Again,
another sniper located in a bunker up the ridge
was spotted, and easily eliminated. By this time,
the Charlie Team had relatively cleared the valley
and radioed for Alpha to proceed and cover the
area to the southeast. Bravo Team continued to
cover the mountain pass.
After proceeding down the valley
to the southeast, Alpha Team noticed a ridge that
headed back towards the northwest to another mountain
pass just east of Bravo Teams position. Fearing
the enemy might flank the sniper team, Alpha positioned
to cover this pass.
Charlie Team continued to the
southeast which eventually headed more to the
south. They practically stumbled on the roadblock
and enemy vehicles. The two snipers of Charlie
Team at a safe distance began plinking of the
enemy soldiers as they scattered for cover. One
by one the enemy soldiers would try and mount
an attack, but not seeing the position of the
snipers their actions were futile. The sniper
team continued dropping the enemies until there
was no more movement. This took quite some time,
as this was an extremely fortified area. When
it appeared the area was clear, Charlie Team lobbed
a few grenades amid the vehicles to ensure there
were no stragglers. Objective One and Three were
accomplished.
All was quiet and the team proceeded to the building
to the south to check it clear, which it was.
The sniper team now proceeded west along the ridge
and again stumbled upon some unsuspecting soldiers.
These soldiers had a decent position behind the
ridge so Charlie Team used a grenade to stir up
the enemy soldiers. Once they were on the run,they
were eliminated without further problem. However,
this action caused a number of soldiers south
of the fortress to investigate the area. Again,
the range capabilities of the snipers proved to
be no match against the enemy soldiers though
the snipers did receive some incoming hostile
fire. With essentially the whole valley clear,
and the extraction zone in sight, Charlie Team
took cover and maintained guard to the north,
keeping careful watch on the fortress.
Objective
Two:
2. Secure Compound.
Not even realizing that Charlie
Team had eliminated a majority of the threat,
Alpha and Bravo Team stormed the fortress in a
combined effort. Bravo drew enemy fire from a
three man patrol to the southwest which they eventually
eliminated and then dispatched a guard manning
a fixed machine gun mount to the north of the
fortress. Seeing a door in the northern wall of
the structure, Bravo Team set a claymore near
the door and retreated to the hill. In an attempt
to lure the hostile soldiers out, Bravo Team fired
a few shots into the door. Sensing the presence
of the enemy at the door, Bravo Team activated
the claymore, immediately dispatching the occupants
of the room. Alpha Team proceeded to the south
of the fortress and spotted a lone soldier to
the south of the fortress. They quickly fired
upon the soldier and eliminated him.
At this point, all hostile forces
were eliminated and all three teams were extracted.
Mission accomplished.
Tips and Strategies:
- As in all other levels.
Move slow, keep your head down and scan
the area you are about to occupy. When leaving
a team in a stationary position, make them go
prone, with their backs protected and give them
an area to cover.
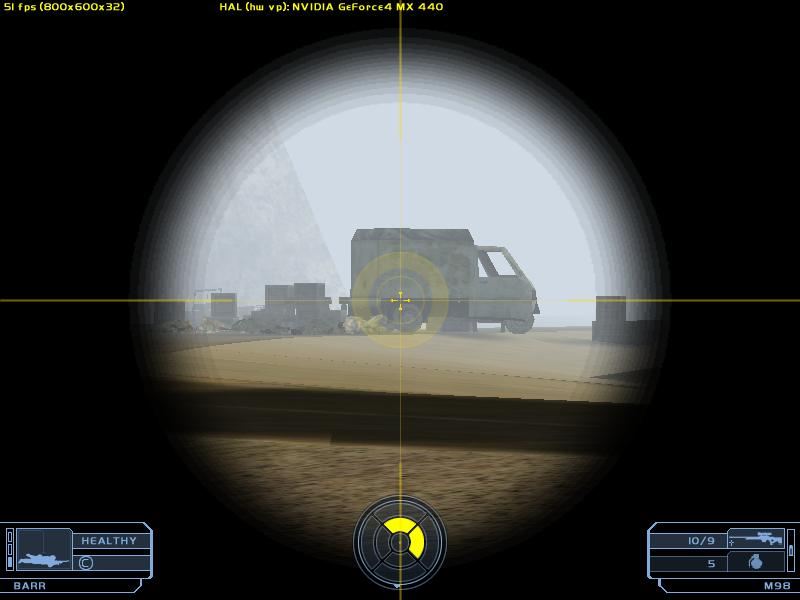
- Use a sniper.
Use two snipers. Always try and engage the enemy
from a long distance. Preferably a distance
where he cant see you but you can still see
him.
- Watch out for enemy
snipers in the ridges. They'll tend to
be higher then your location, so just looking
straight ahead won't cut it. Look up and down
too.
|
